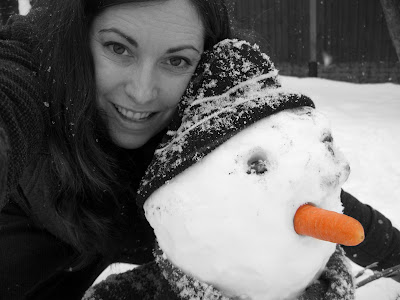
I just learnt this technique the other night and in response to a request, here is my quick and easy guide to removing colour from photos. I did it by trial and error and it only took me 10 minutes so with these instructions hopefully you'll have the photo that you want in a few minutes.
Perhaps the longest step is the downloading of software. There are lots of free programmes out there but I went for Serif PhotoPlus. Warning! It does come with an Ask! tool bar on Internet Explorer but I uninstalled this (via the control panel) and the PhotoPlus still works :)
So once you're downloaded that you're ready to begin. Open it up. You will have a few options in a purple box central to the screen. Select 'Start new picture' and okay to whatever it offered! You should have a white 'page' central to the screen (the orientation doesn't matter because it'll change it for you when you open the window.
Locate 'File' in the bar at the top and 'Open'. Find the photo that you want to use and open that one. This is your background layer and you will use the colour from this one.
Make another layer by dragging the cursor at the top left hand corner down to the right hand corner, selecting the whole picture basically.
Select 'Edit' (next to 'File') and then 'Copy'. Now go to 'Layers' and select 'New layer from selection copy'. You should now have two layers displayed on the right hand side.
Next you need to make this top layer B&W so, again from bar at top, select 'Image' and then 'Adjust'. Towards the bottom it says 'Greyscale'. Select that. It opens a new screen and I just hit okay. It'll take you back to the original page, and the photo on top should be B&W (this sometimes takes a while depending on the size of the image- don't panic!).
Now you need to rub the photo away in the place you want colour so on the left handside select the rubber (about half way down, pink and rectangular). Use it to rub out from where you want colour to come through. You can make the rubber bigger at the top where it says brush size and you can zoom in by doing 'ctrl' and '+' a few times. If you make a mistake there's an 'undo' button at the top and you can start over. Then choose 'Merge' from 'Layers' and click 'Merge down'.
Once you're happy do 'File' and 'Save' (or select the disk icon to save quickly).
And hey presto! Easy isn't it :) Enjoy and I'd love to see your finished photos, so please post a link for me to look at!

1 comment:
ooo, thanks so much! It's my new favourite thing :)
Post a Comment